How To Create Effective Email Template for Segmented Audience
Are you struggling when personalizing your email messaging to hundreds or thousands of customers? Email template editor allows you to adjust templates to each segment of your target audience. This step-by-step guide will walk you through how to save your time and increase the effectiveness of your email marketing.

Email marketing automation can help you when sending hundreds of emails to your customers. Email editors allow you to use pre-built templates and adjust them to your audience or create your own template if desired. Sometimes, you might need more versions of one template to address specific segments of your target audience. And there is no need to do this manually. Instead, you can use a “Variant” feature allowing you to create several versions of your email in one template and, by that, automate targeting the right segment of your target audience. In this blog post, we'll explain how to create more versions of your emails and automate them in one step.
Personalize Your Email Marketing with Template Variations
How to personalize your email marketing? You can create several templates, but you can also create one template and design specific versions (called variants). How? Via dynamic email content.
Here is a step by step guide walking you through the process including an example.
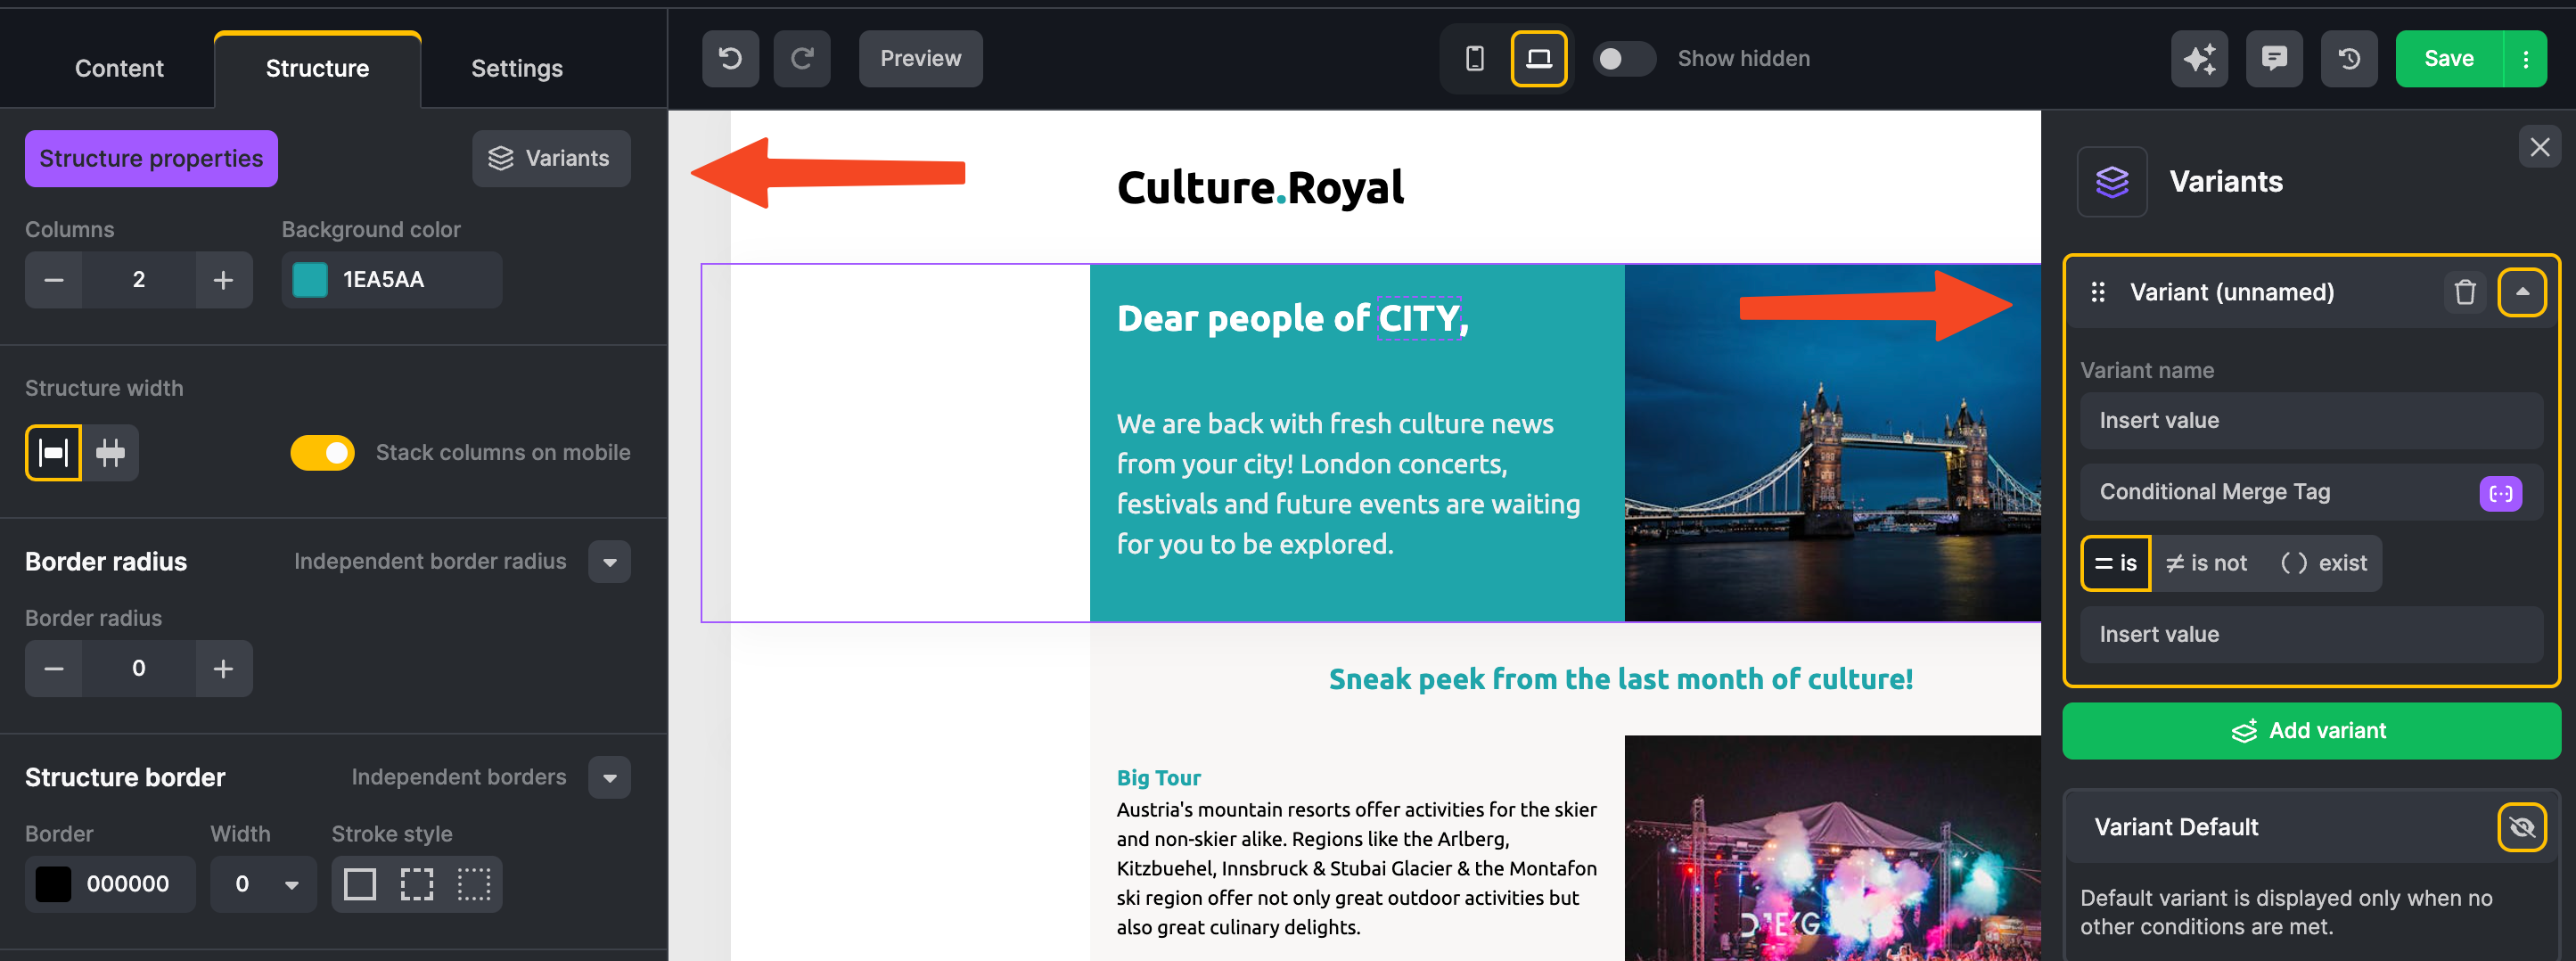
As a first step, open the template's editor, choose your template or start designing your email from scratch. When ready, click the purple block being necessary to tailor to each segment and click “Variants” in the left menu (in the “Structure” column). After clicking it, a panel on the right side displays, and you can set a condition under which each email option will be used.
How To Use Merge Tags and Conditions
Each email version needs to have a condition upon which it is going to differentiate the receiver. You will set the condition based on a merge tag. A merge tag is a unique identifier that corresponds to your account's data. Working with the credentials you have, it could be the user's name, surname, city, country, company, or any other value your database stores. It's not necessary to fill in the city name for each contact - you can leave it to the email sender software. In the picture below you can see predefined merge tags.
| Merge Tag | Value |
|---|---|
| *|NAME|* | First name |
| *|SURNAME|* | Surname |
| *|EMAIL|* | |
| *|VOKATIV|* | First name (greeting) |
| *|VOKATIV_S|* | Surname (greeting) |
| *|PRETITLE|* | Degree before name |
| *|SURTITLE|* | Degree behind name |
| *|GENDER|* | Gender |
| *|STREET|* | Street |
| *|CITY|* | City |
| *|ZIP|* | Zip Code |
| *|COUNTRY|* | Country |
| *|COMPANY|* | Company |
| *|PHONE|* | Phone |
| *|BIRTHDAY|* | Birthday |
| *|NAMEDAY|* | Nameday |
Considering your merge tag, you need to set one of the three conditions, stating upon which condition the email will be delivered in which version.
There are three conditions available:
| Condition | Meaning |
|---|---|
| = is | If the value of your merge tag is represented within your contact values, your variant will be used. E.g., if I choose merge tag *|CITY|* =is “London”, this structure variant will be used for all who have stated “London” within their city details. |
| ≠ is not | If the value of your merge tag is not represented within your contact values, your variant will be used. E.g., if I choose merge tag *|CITY|* = is not “London”, this structure variant will be used for all who don't have London stated within their city” details (e.g., people from New York, Berlin, or without city details). |
| (exists) | The contact value of your merge tag doesn't need to have a specific form. The important thing is, it is filled in. For example, if I choose the condition *|CITY|* (exists), the email variant will be sent to all who filled the city in - doesn't matter if London, Berlin, or New York. |
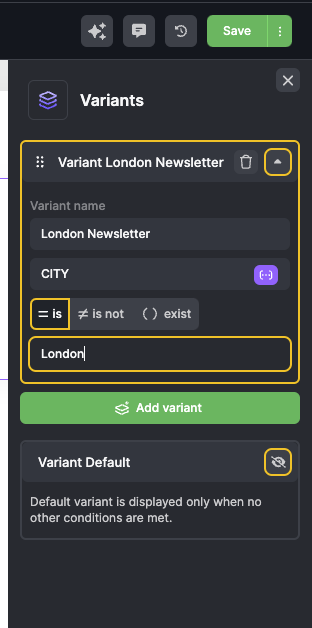
After filling your first variant in, you can click “Add variant” and create any other condition upon which you'll send a tweaked version of your template.
It's also good to create a so-called default variant. This version will be sent if the contact doesn't meet any of your conditions.
Example on How To Tailor Your Email to Various Segments
Let's have a look at our example. In our Topol.io editor, we will play around with a city merge tag. By using the “variant” feature, we will create various email versions within one template. You'll see a different salutation and a special image at the email header - all based on the merge tag and condition you choose. The version will depend on the value filled in within the contact city details.
The first option of the newsletter is designed for people living in London. Merge tag *|CITY|* will be complemented by condition IS. The header will be addressing people from London together with a Tower Bridge image.
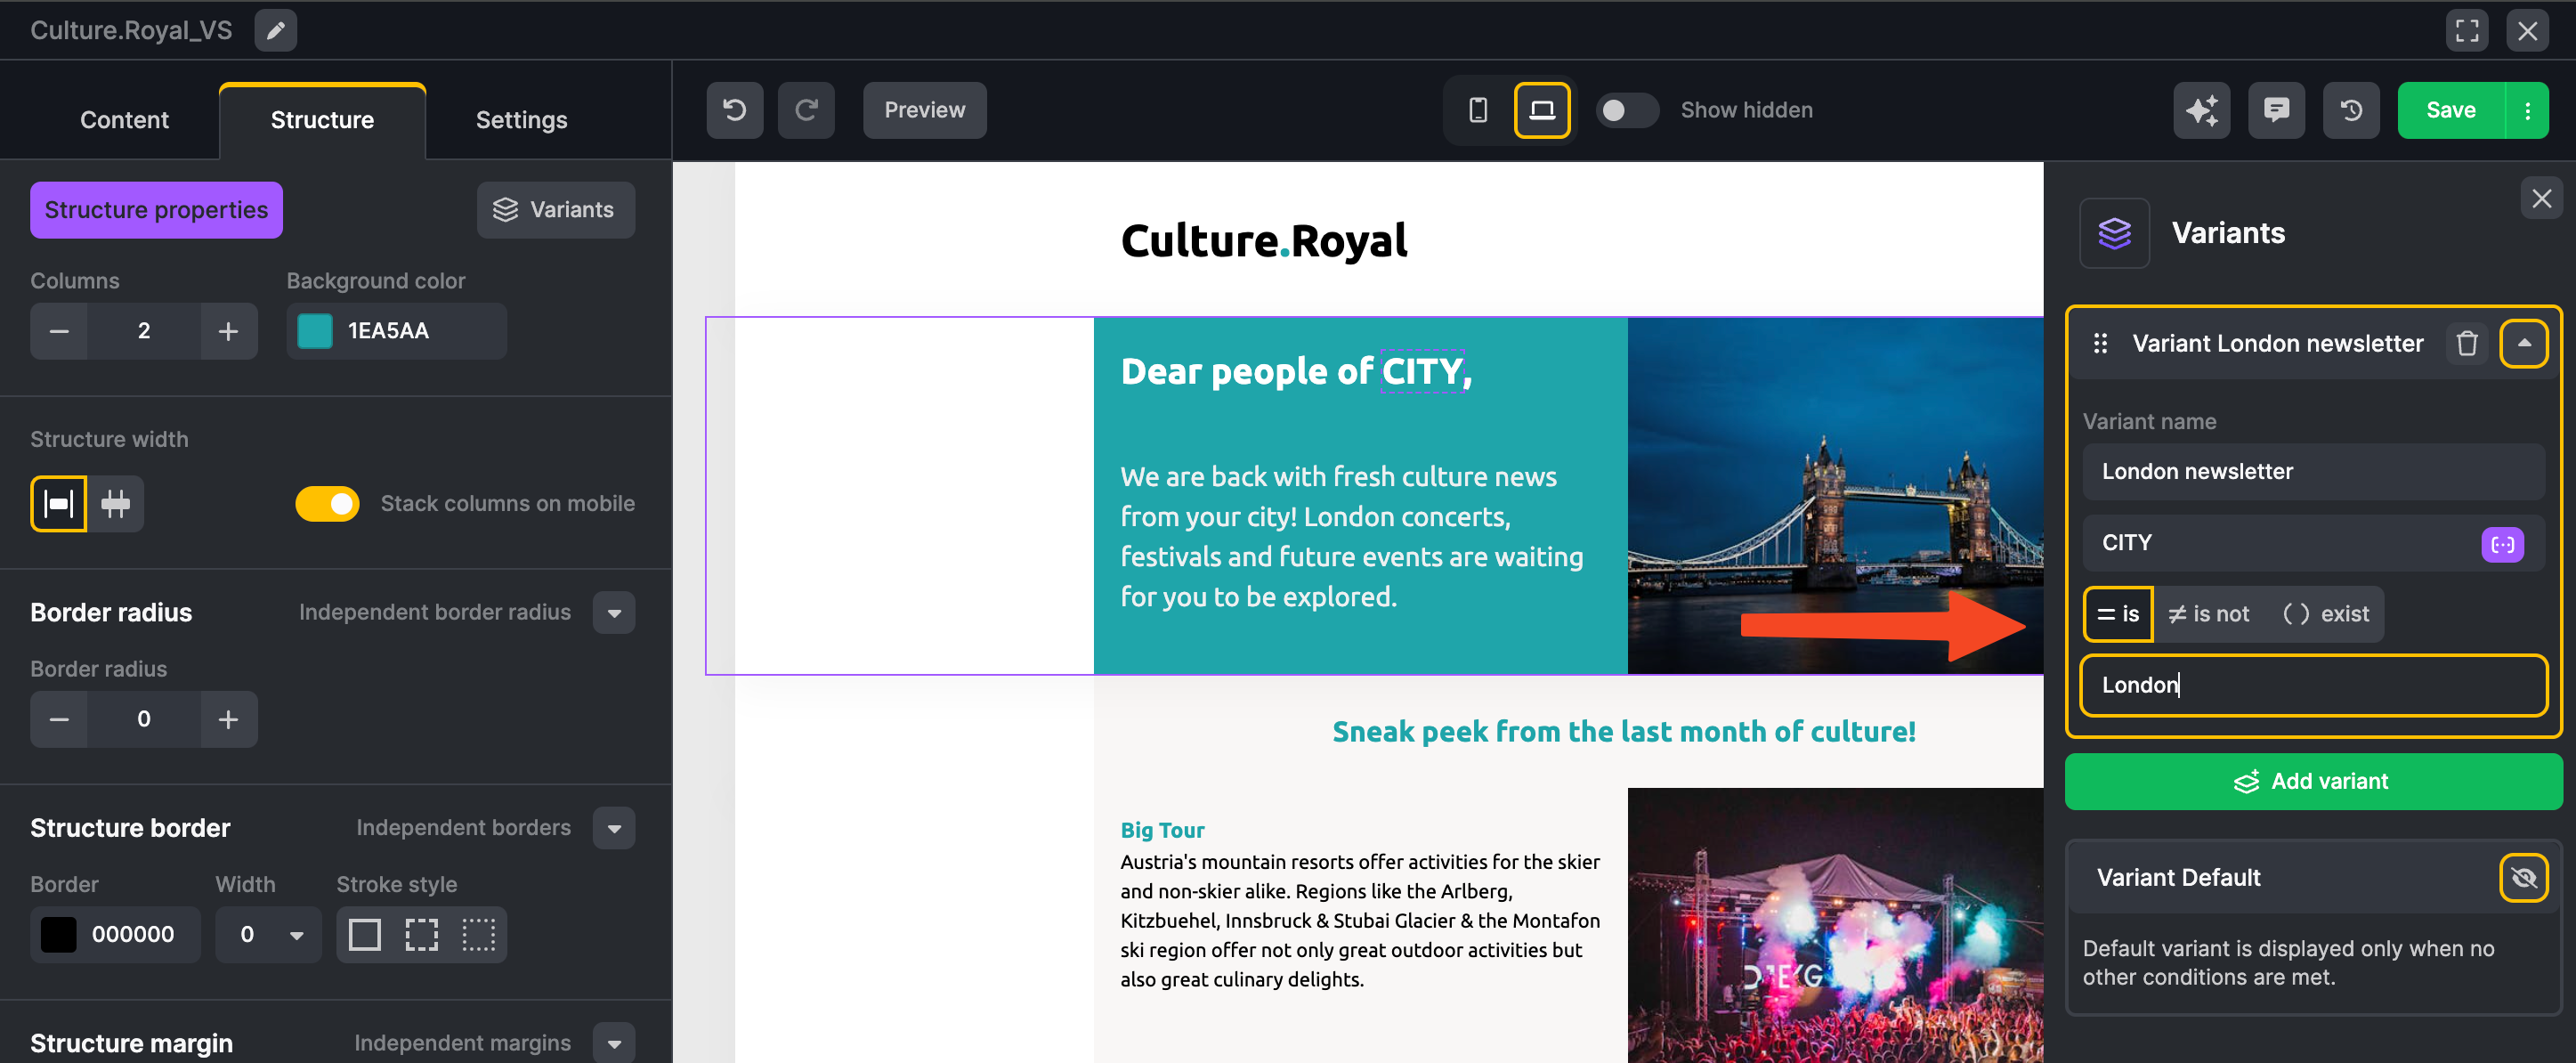
You can create other options in a similar way.
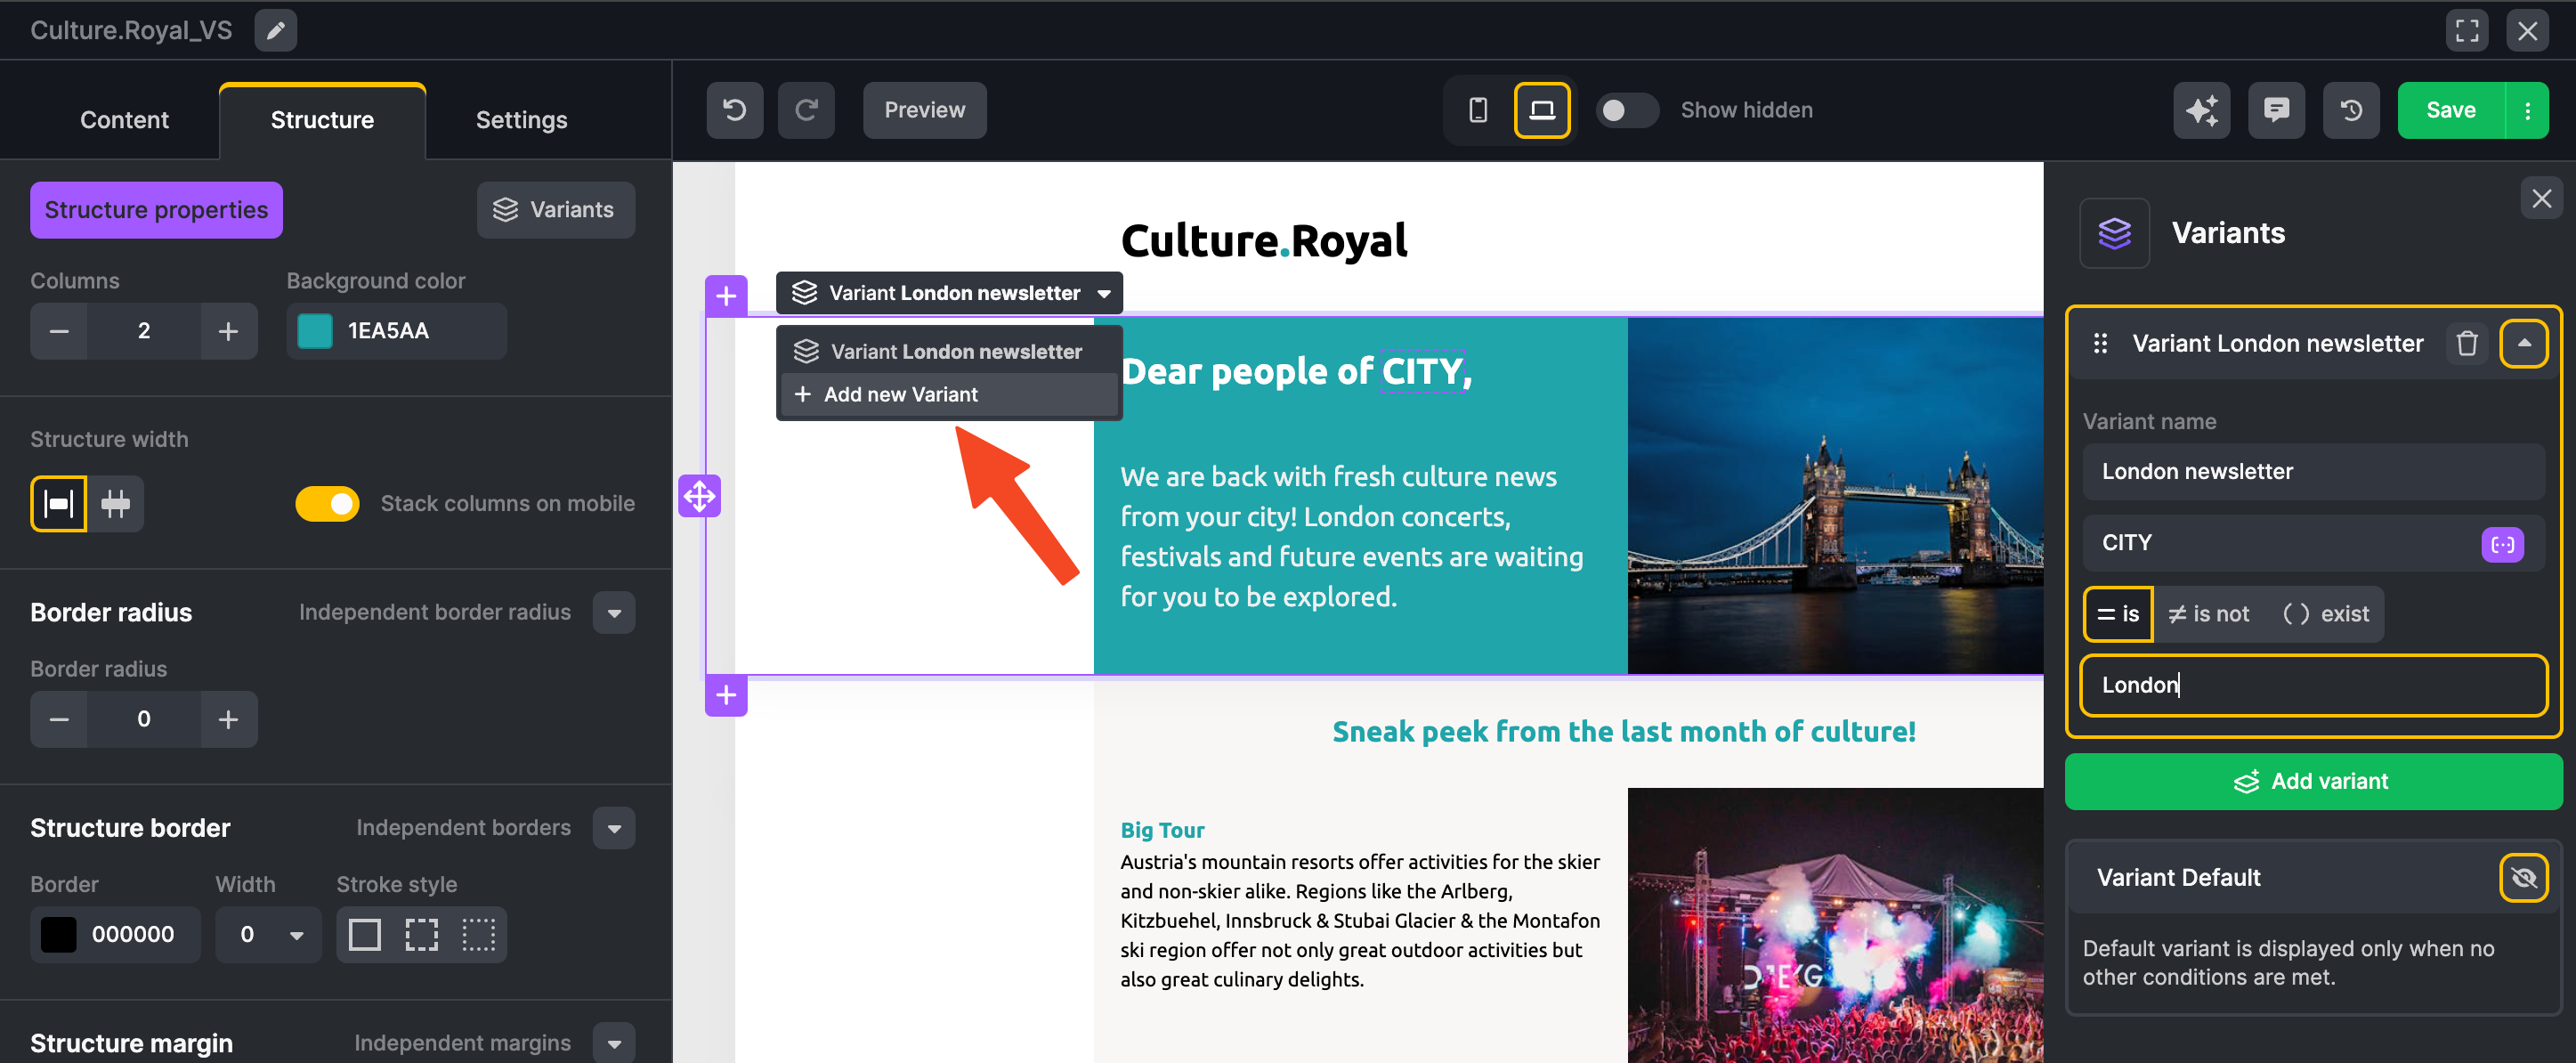
Another version will target people from any city (except London), setting the condition as *|CITY|* (exists).
Conditions are fulfilled gradually. If the first condition targets London people, they will receive this email, and the rest of your contacts will be sorted based on the second and later third (or any other) condition.
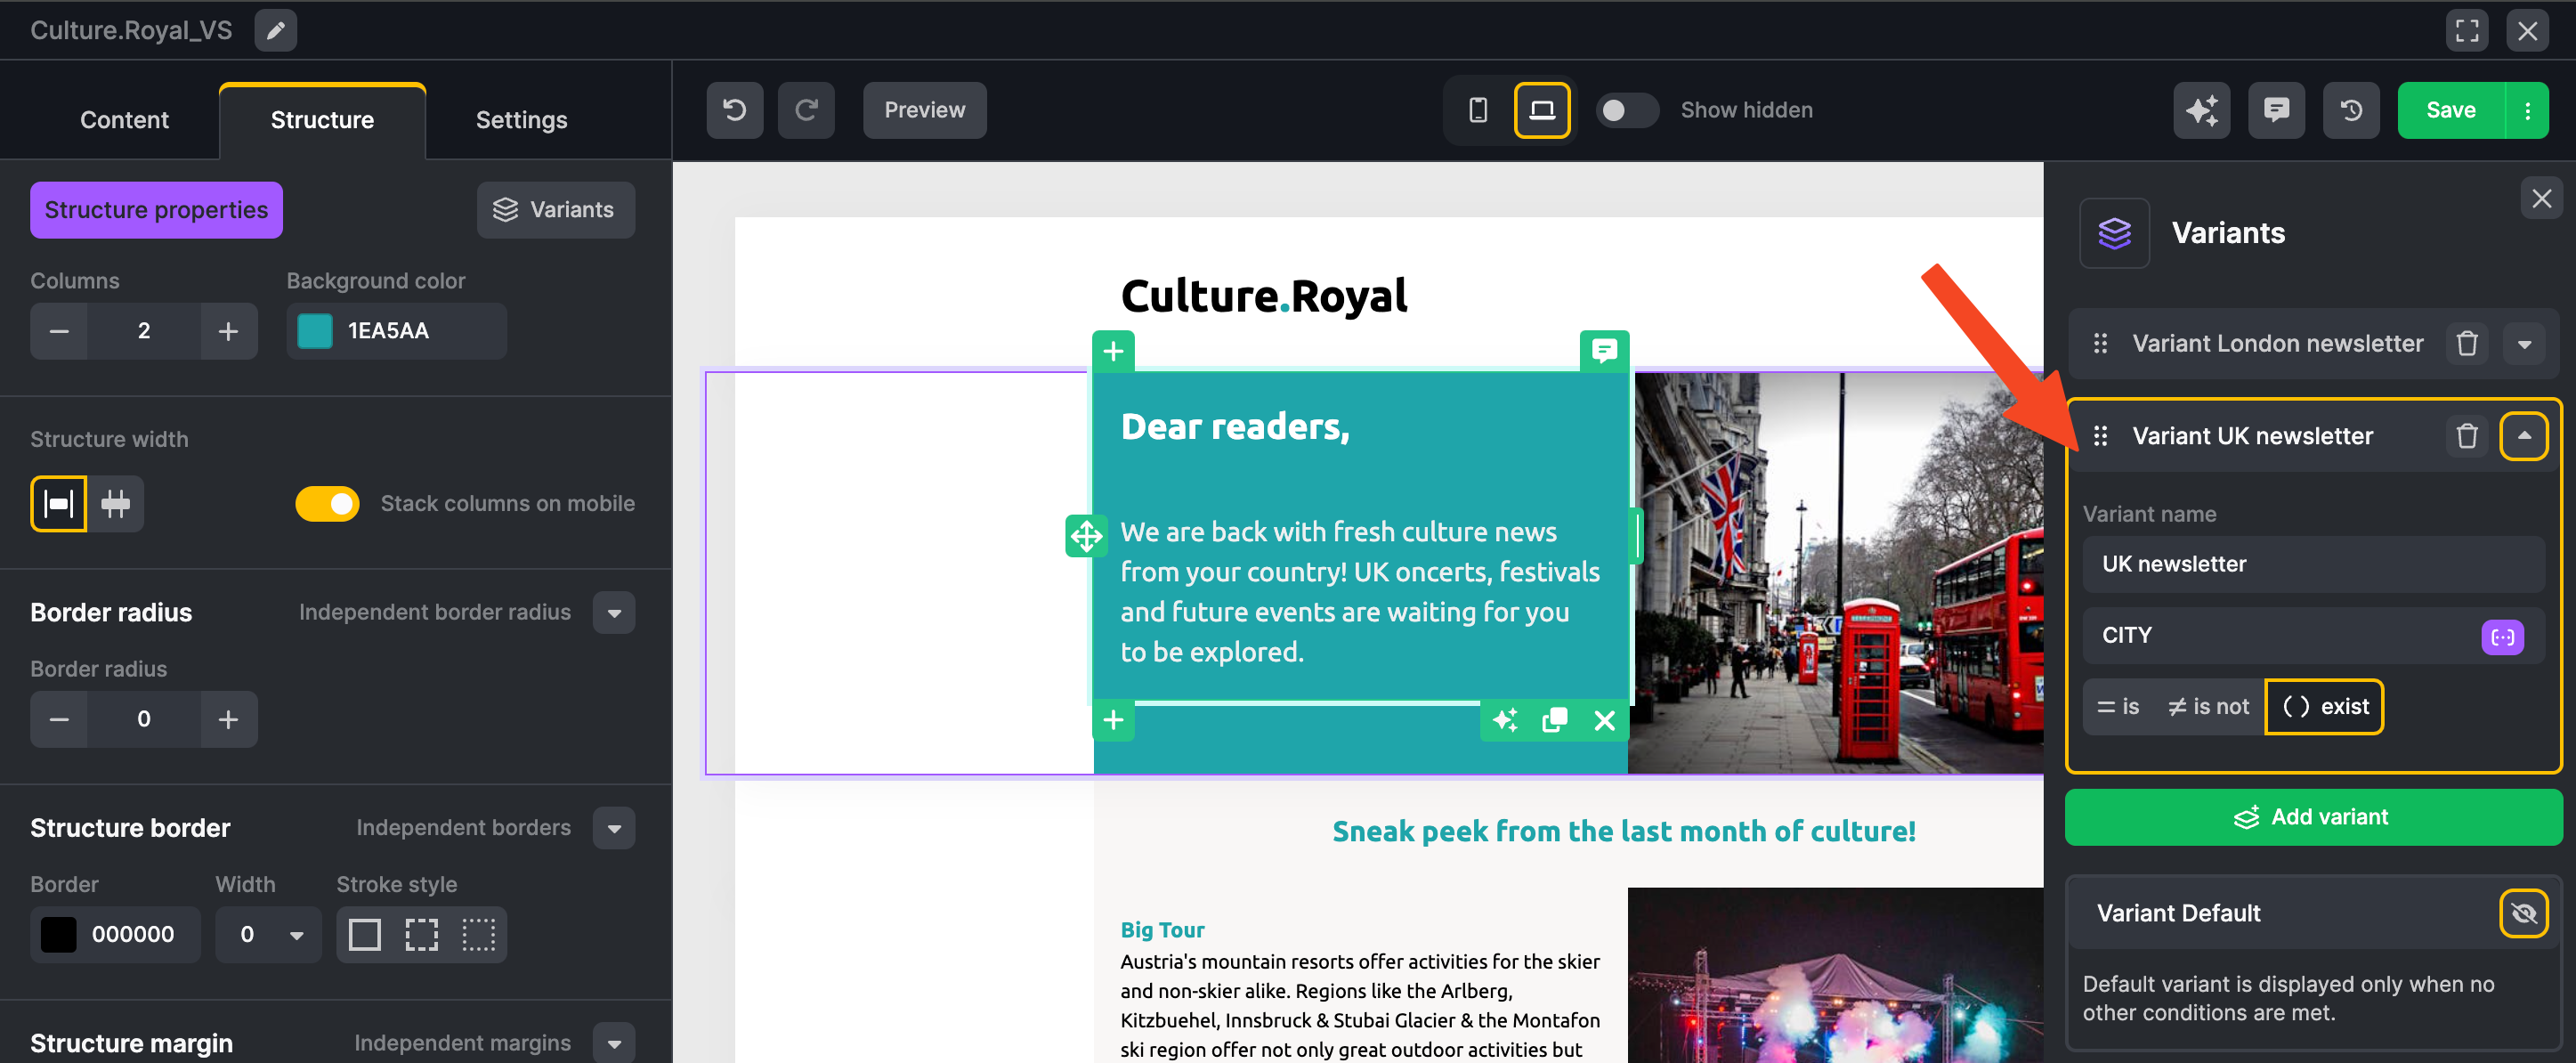
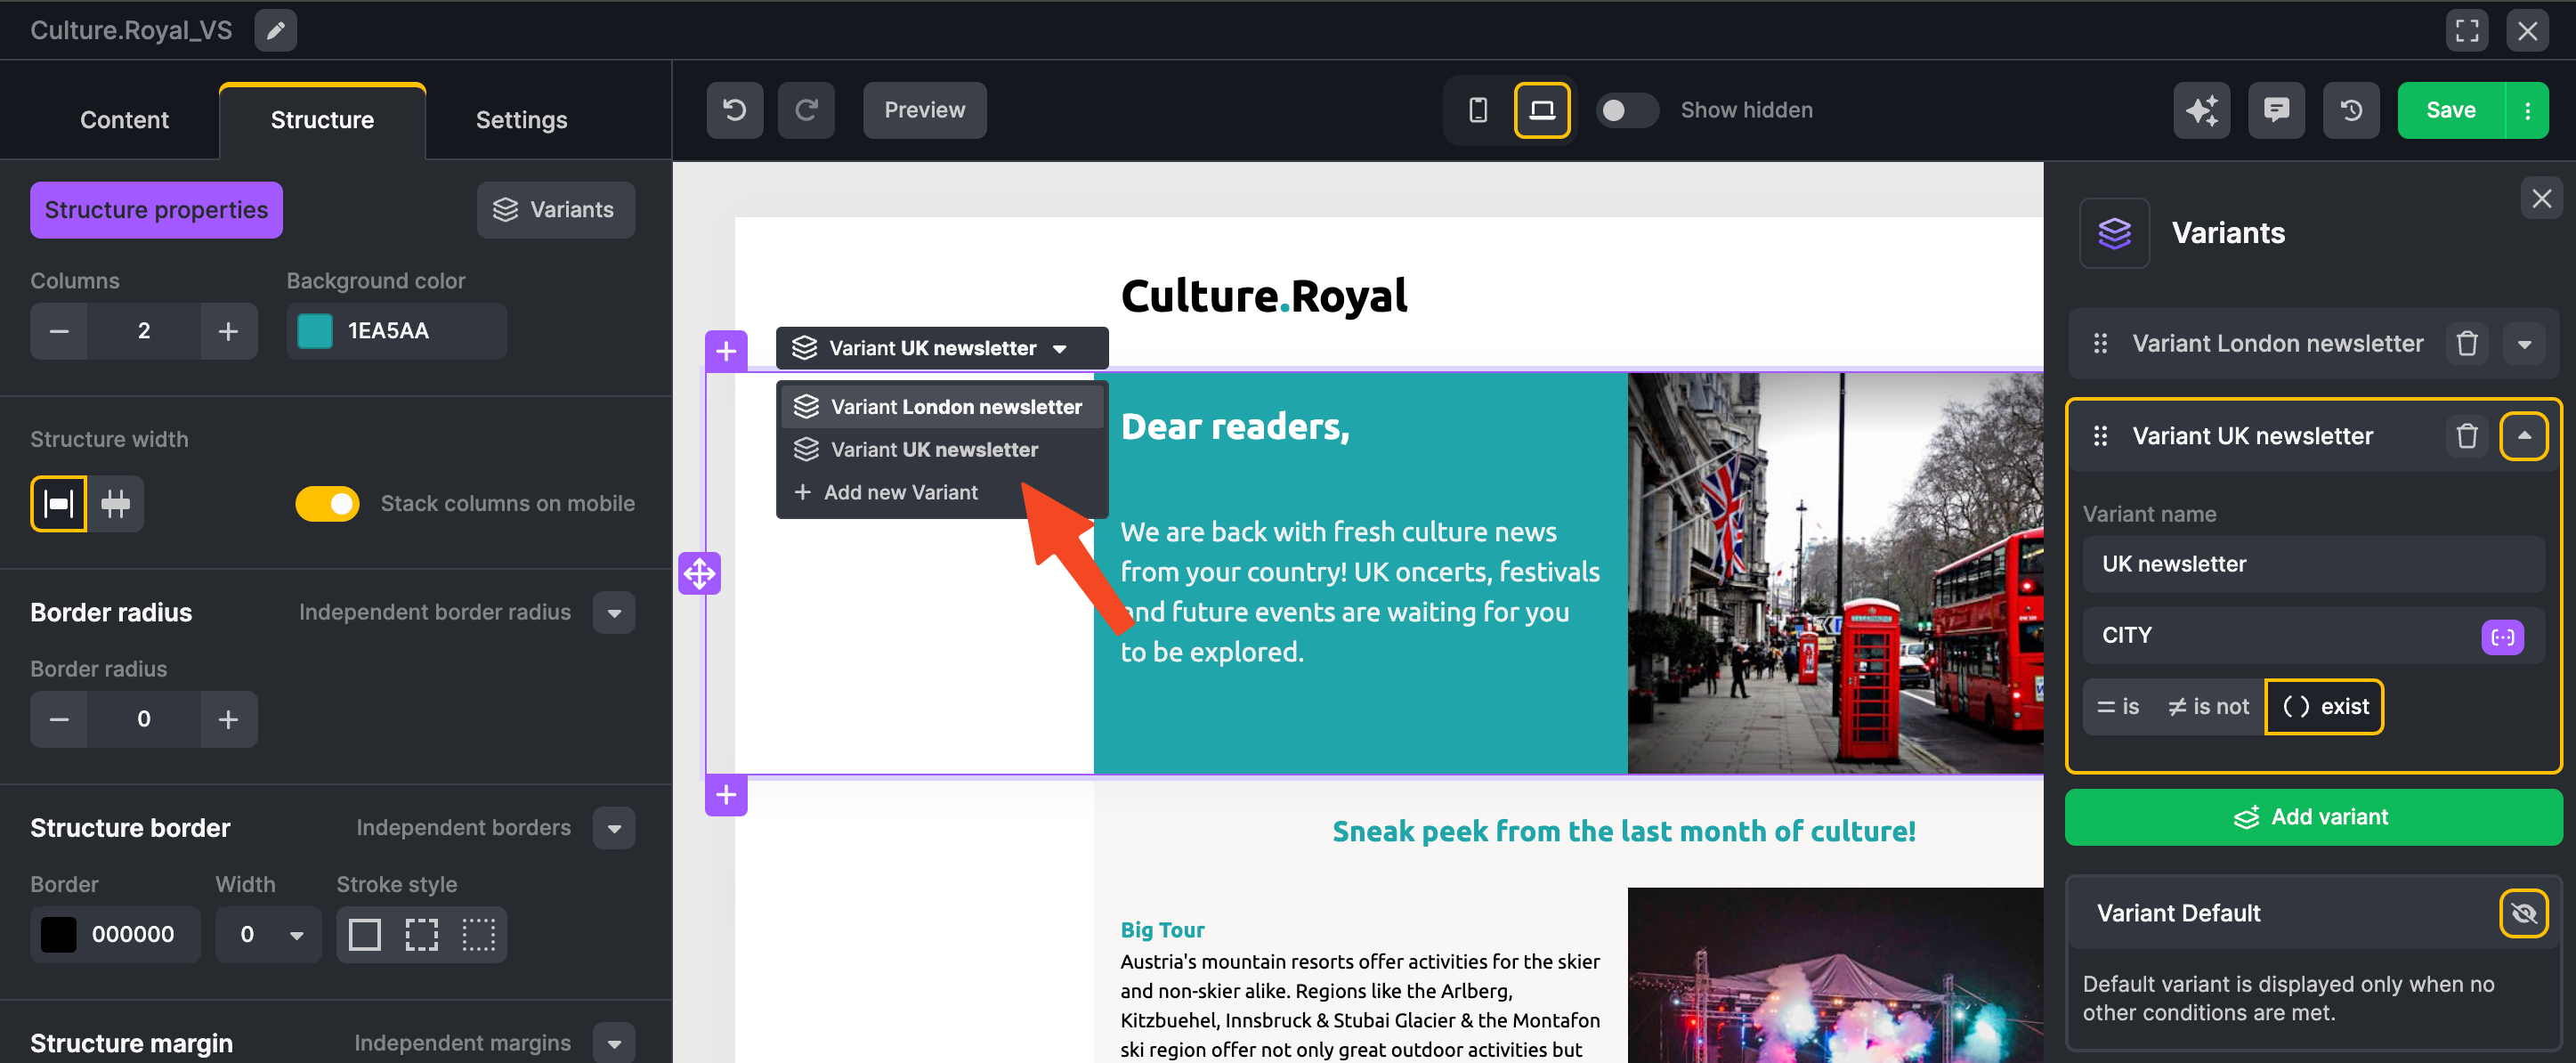
You can easily switch between each variant.
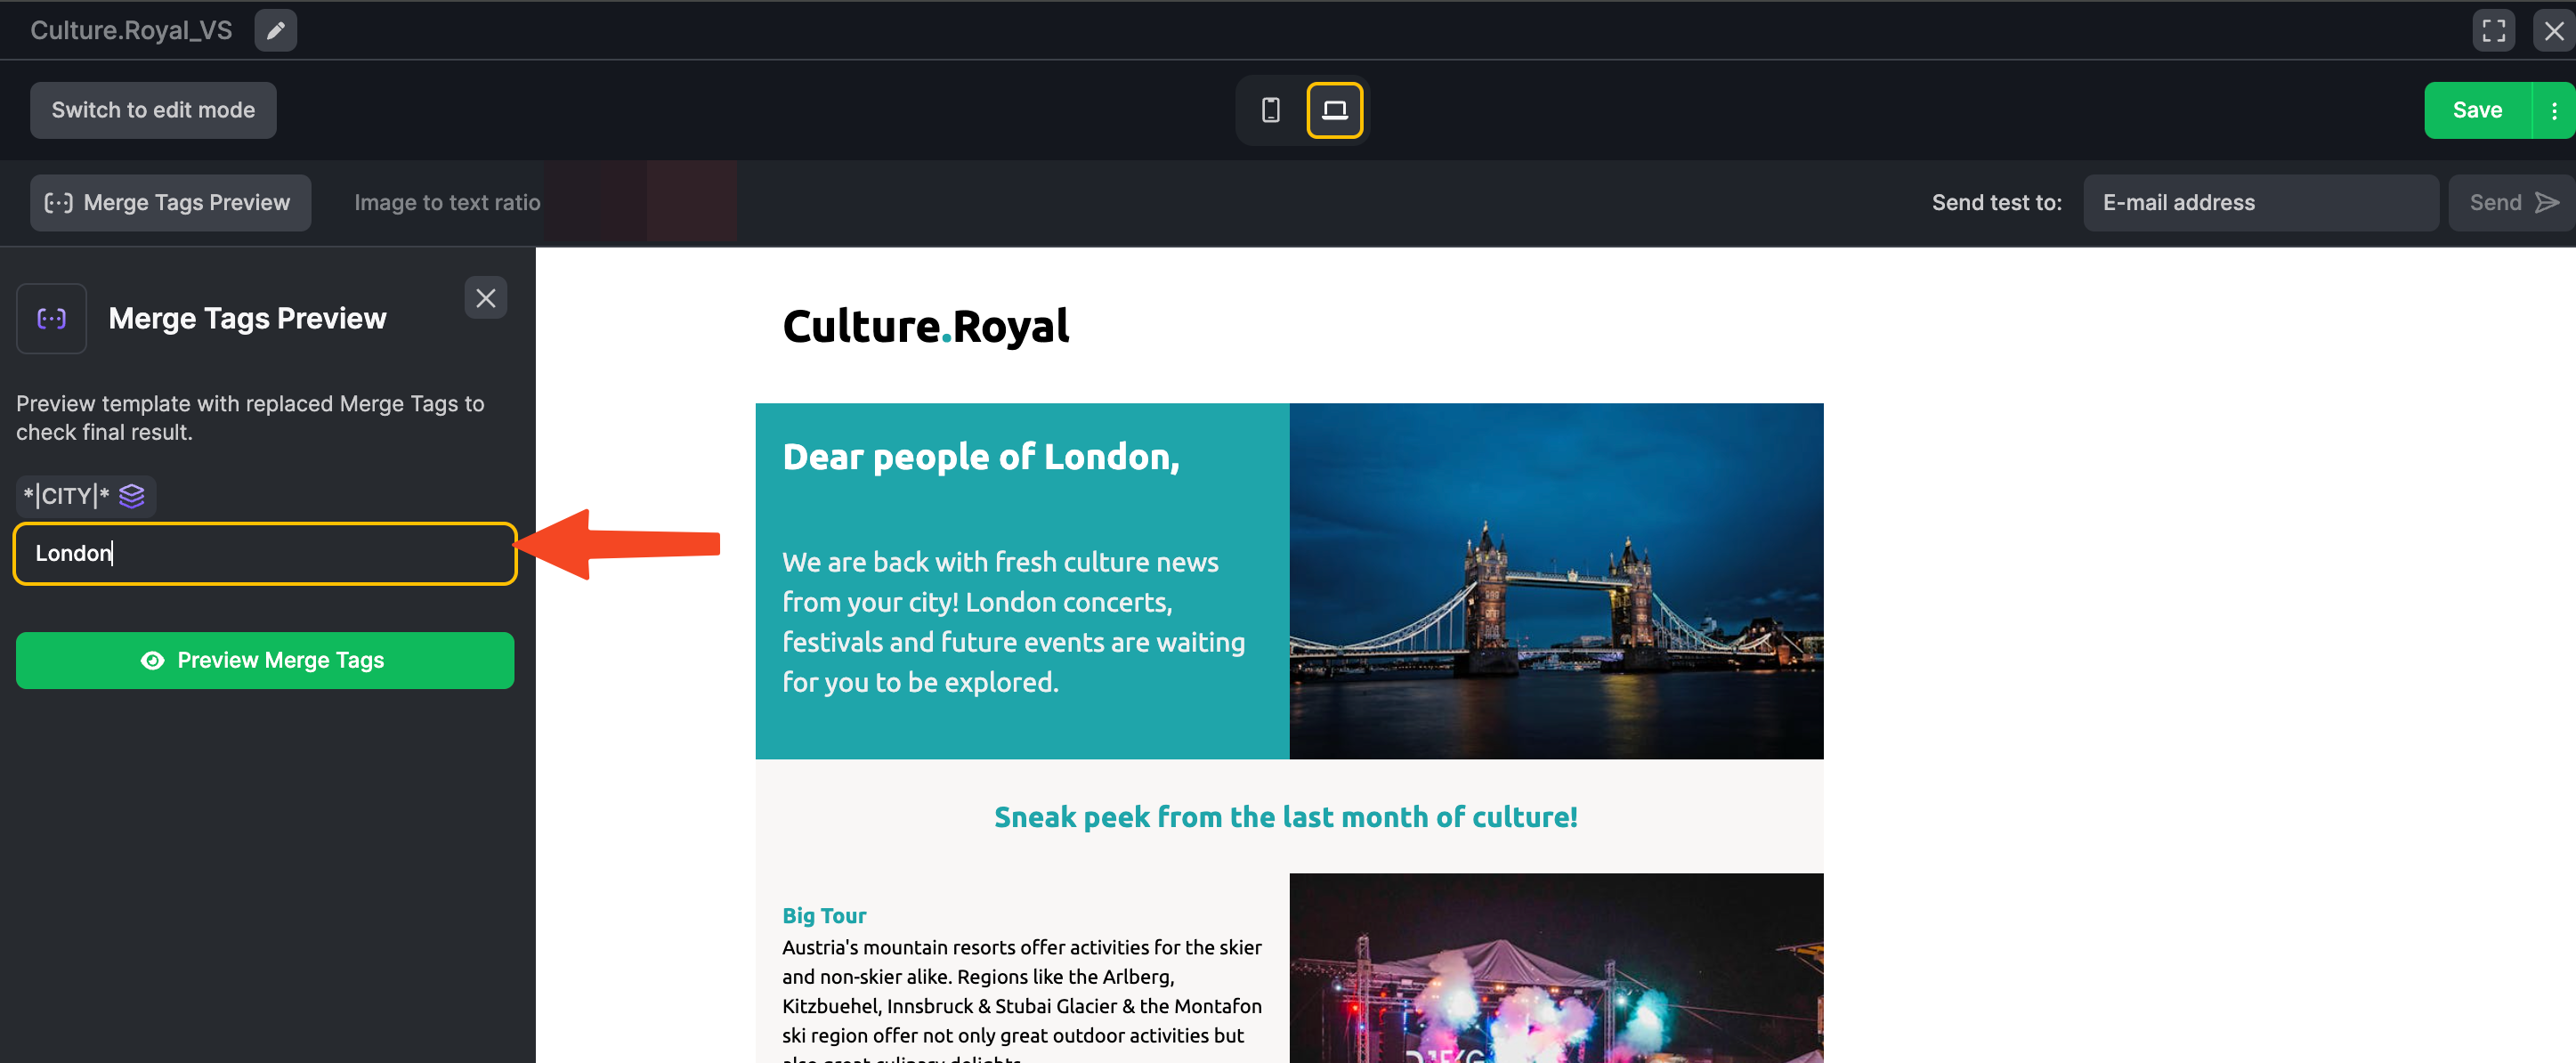
Before sending an email, make sure your variants work as required by checking it in Merge Preview. On the top menu choose Preview -> Merge Tags Preview -> fill in any value that is represented in your contact list's details, and you will see how the email will look in reality.
Your audience is now ready to receive your emails!
Ready To Learn More?
Interested in automating your email processes? Topol.io templates editor can become part of your application, allowing you to customize your emails to your needs - sending catchy emails and saving your time simultaneously. Try a 60-day free trial and see for yourself!